Getting Started
Simply follow these steps to help you get set up. Before you 'go live' please test the payment flow on your webpage using our sandbox test network and use our demo bank app.
- Get a developer API key. Get a developer API key.
- Follow the BOPP Checkout implementation documentation and examples and embed the button on your own webpage.
- When you are ready to go live, sign up for a BOPP Checkout account and generate a live API key.
- Update your webpage with the live API key.
That's it. You are now ready to accept payments from your customers and users via BOPP!
How It Works
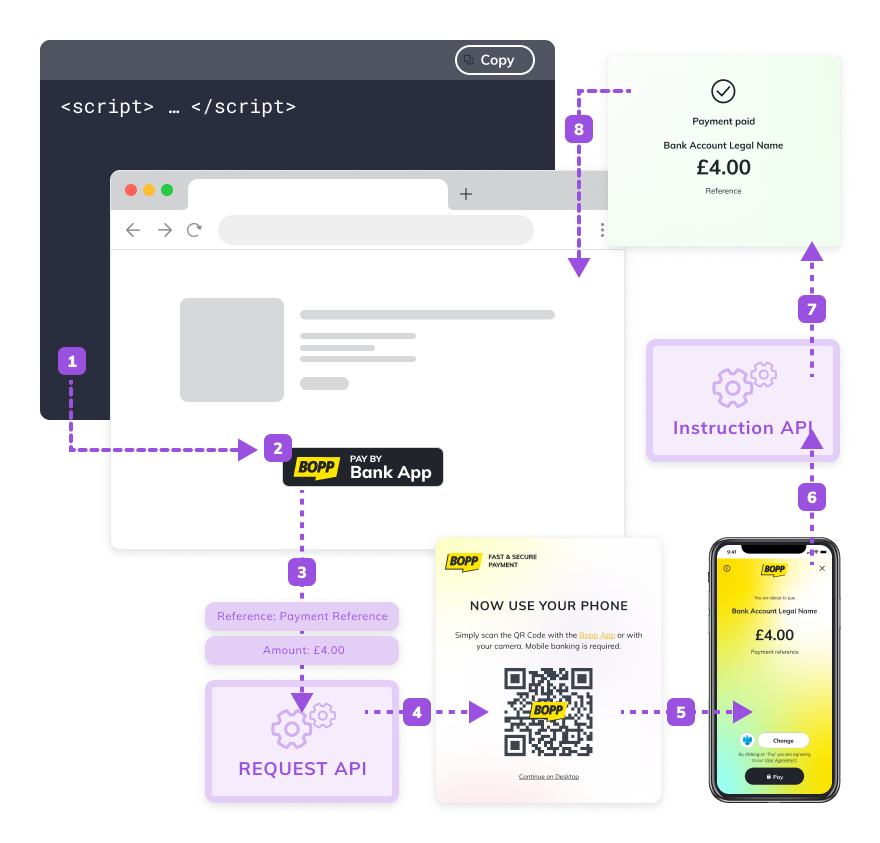
The button needs a checkout amount in the BOPP payment request as a parameter. How you do this is up to you. It can be a static amount, hard coded on your page, or you may want to use a form to let the user enter the amount they wish to pay (e.g., if you were asking for a charity donation).
This amount, together with your API key is sent to the BOPP servers to generate the necessary paylink. This is returned, embedded in an HTML overlay which displays in a <div> over your webpage content. This overlay allows the end user to initiate the payment flow on a separate device (if required, e.g. desktop-to-mobile) or on the current device (e.g. desktop-to-desktop, mobile-to-mobile).
During the payment flow a connection, via websockets, is maintained between the overlay displayed over your webpage and the BOPP paylink servers. As the status of the 'payment request' updates, this connection allows the overlay to report to the user their place in the payment flow.
Once the payment flow has been completed, or the overlay is manually closed by the end user, the websocket connection is closed and the browser is once again showing your webpage.
User Flows
There are three primary flows:
